

We've been working harder than ever at WOPC to bring together our two fan bases: nerds and crafters. With that in mind, we set out to create a handmade nerd quilt just for that particular demographic. We've also realized that many nerd crafters are of the generation who are currently having children, settling down, starting families, etc. Thus, the crib-sized Tetris Rag Quilt was born! Made in much the same way as our ever so popular Rag Quilt, this Tetris quilt is simple and soft enough for use in a nursery....as long as that nursery is full of bright colors!
To make this puzzling quilt you'll need:
- 2 1/4 yd. Black Flannel
- 1 1/2 yd. Gray Cotton
- 1/2 yd. Turquoise Cotton
- 1/4 yd. Orange, Purple, Red, Yellow, Green and Dark Blue Cotton
- 36"x54" of quilt batting (or a little less)
- Black Thread
Once J and I decided to create a Tetris quilt, our first objective was to pick a design we found aesthetically pleasing yet accurate to a game of Tetris. We Google image searched and found something we liked enough to copy the structure. I worked to change some of the colors so that there was a better variety and contrast, but made sure not to do anything that would go against the mechanics of the game. We also decided to go with a black backing but gray front. There were two reasons for this: a black quilt is a bit much for a baby crib and the contrast of the "rag" style would imply the grid pattern Tetris is built on. Our final version looked something like this:

As you can see, it required playing with colorful markers and a few calculations, but I wanted to make sure that I didn't make three trips to the fabric store this time. Once we'd gathered all our fabrics, we started the incessant process of cutting out squares. You can see our square count on the above diagram. This is very important, as you don't want to come up short but also don't want to spend your life cutting out unnecessary pieces. For every square of cotton the quilt requires a square of flannel and a slightly smaller square of batting. I usually cut my batting approximately an inch smaller than my fabric squares.
After lots of cutting, I laid out my basic design to make sure I was satisfied:

Pleased with myself, I set out creating quilt sandwiches. The process for that, and for the rest of this quilt you can find in my previous Rag Quilting post. The glory of a rag quilt is that the process is all machine based and very straight forward. As long as you plan ahead and pay attention, you can achieve many beautiful patterns without having to learn new techniques. Prior to snipping my seams to create the rag effect, this is what the quilt looked like:

So, speaking of snipping seams, we learned a lot during our first rag quilting experience. The most important lesson, however, was that anyone planning on doing much rag quilting needs to invest in springloaded fabric scissors. Our last quilt left both of us with bruised thumbs and hand cramps. Thus, I jumped on Amazon and ordered a pair of Fiskars springloaded thread snippers. They're recommended by the Arthritis Foundation, and I can totally see why. No hand cramps or bruises this time!
 |
| Pre-washed rag effect |
To get your rag quilt to look comfortable and rag-like, you will need to wash and dry it a few times. Lessons learned during this process include: not washing anything else with your quilt, cleaning out your lint trap every 45 minutes, running your washer and dryer without anything in them after you're done with the quilt, and possibly checking your dryer to see if the hose that goes back to the wall needs to be cleaned out as well. In other words, these quilts make a huge mess of things due to all the flannel and little threads that come out in the wash. I've been having to de-lint my clothes for weeks!
Overall, we're very pleased with the end product. I especially like the traditional T-shaped piece falling from above. While we were working on this project we also started making Perler bead creations and I quickly realized that anything I make on a square Perler grid could be turned into a rag quilt design. With that in mind, I have a feeling our next quilt will be something 8-bit themed. Stay tuned to see where we head with that idea!
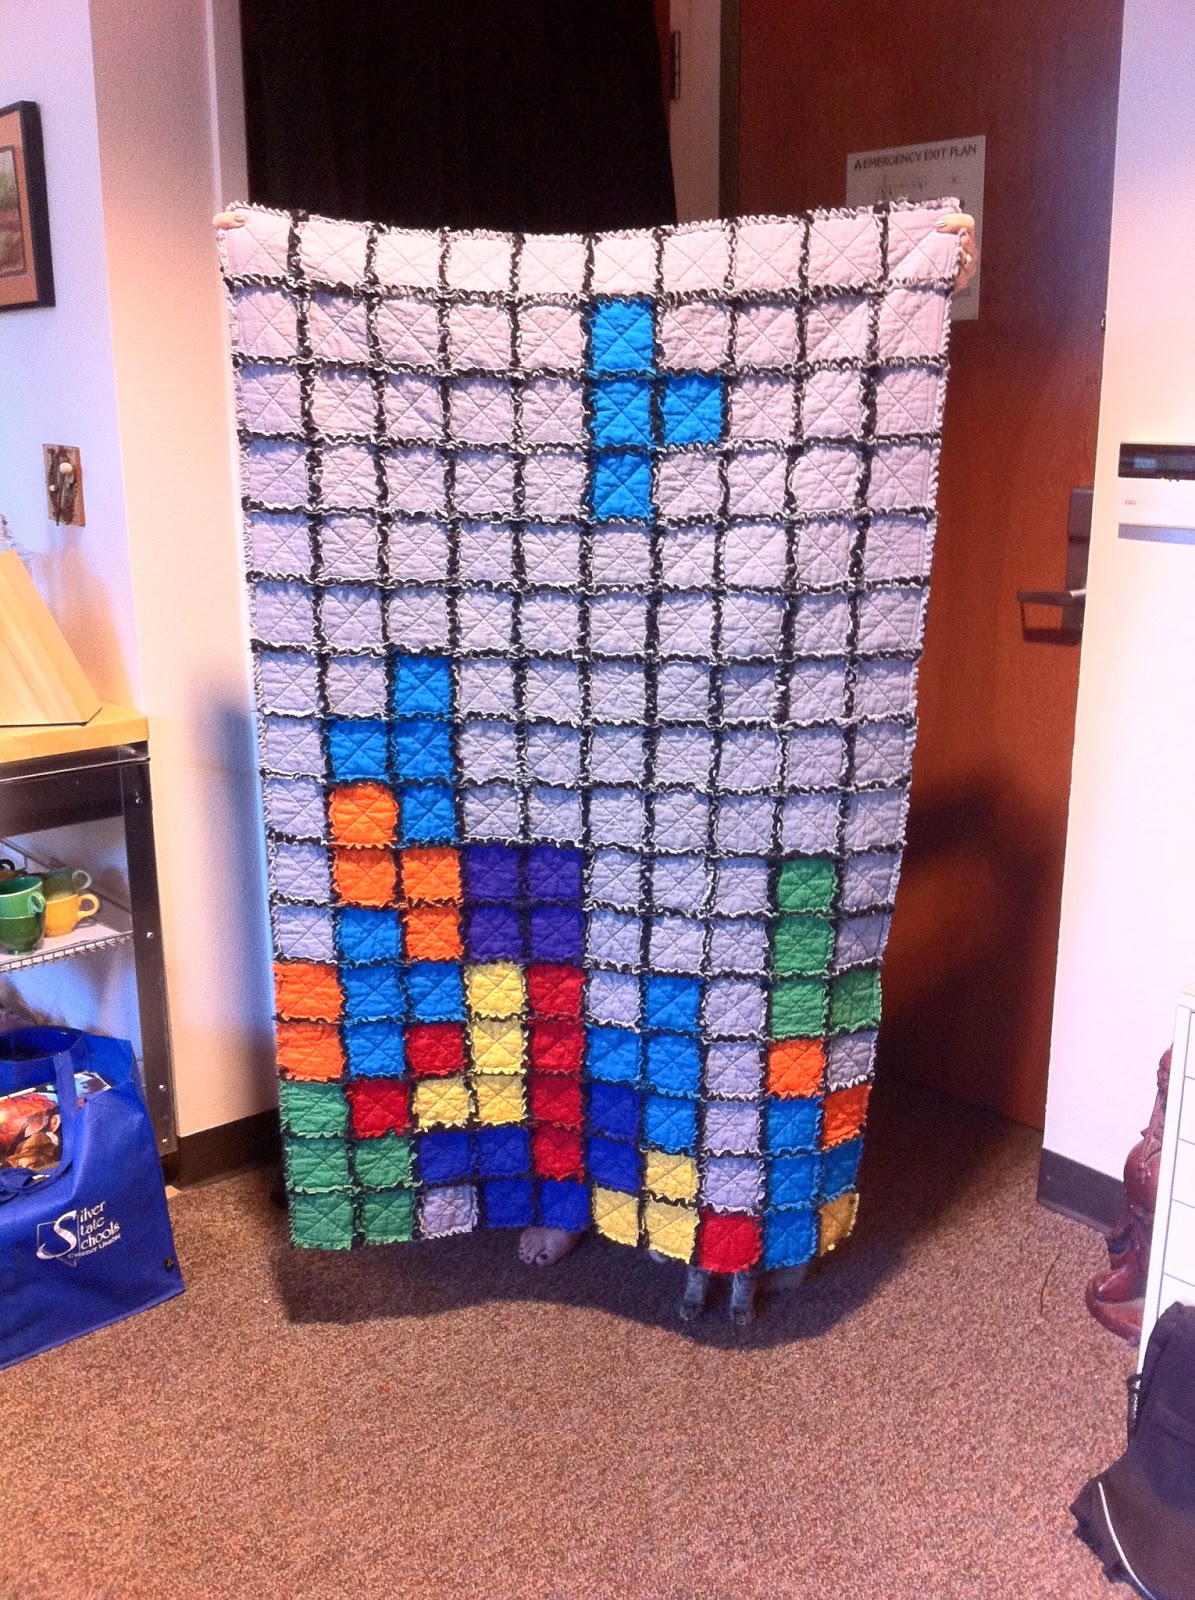 |
| My favorite thing about this picture is that Cat insisted on being in it. |
How do I contact the guys behind this blog? Some of this stuff is super amazing and I'd like to see about cross posting it over at FanboyTV.com. You can email me at Gavin@FanboyTV.com
ReplyDelete