

It seems like just yesterday that we were discussing the woodworking for our minibar-- Wait, Part 1 was put out in July? Before the long darkness where we just wasted your time on budget costumes? Huh.
Well, we finished it a few weeks back but we were on a roll for Halloween, so you'll have to forgive us if it took a while to show you. We haven't gotten any messages about woodworkers sitting with an unassembled bar in the living rooms waiting on us, but that doesn't mean we don't owe you any closure. So here we go: staining, bottle caps, and resin. Let's build this thing.
DISCLAIMER: You may notice that throughout this write-up I haven't been as specific as usual about what we're using. This is intentional: I come from a theatre woodworking background, not fine carpentry. I am not an expert on stains and finishes, I've never boiled linseed anything and I don't know any ratios that involves exotic solvents. I come to this stuff the same way you will, by doing my research online, sucking it up and asking someone at the home store, and making mistakes. Do stains and the specific brand of water-based polyurethane we used get along? They sure do. But I can't guarantee your combo will, so please look into your specific needs for something like this.
Back to the article:
For a piece like this, stain is the way to go. Stain reveals a wood's inner beauty and classes up your home. There's nothing like the organic variations and subtle grain to stained wood, but it does mean that you have to be careful through the assembly process. Stain settles into the surface fibers of wood, which means there can't be anything in those fibers to begin with: glue, resin, oils of any kind. When applying adhesives, apply them carefully with a brush or good judgment instead of pouring it in there and squooshing it out onto everything. Be thorough, but stay clean. This is largely a matter of "feel", so best of luck.
Also, stain by its nature is translucent. You can see everything on the wood, which means overzealous marking of your project will also be there. Light pencil marks erase or sand away, but if you bear down (or have used Sharpie!) that "27-5/8" is there to stay. I advise painter's tape and Post-Its if you are doing a lot of marking.
 |
| Already stained, but the point remains. |
Sanding, staining, and clear coating is always easier to do apart than once it's together. Imagine if you could paint the interior of your house by laying all the walls flat, no corners, no windows or anything put in yet. Easy, right? The same is true for furniture. You get more even results by treating everything equally. We assembled the large pieces and kept all the shelves and wine racks and whatnot separate so that there were far fewer little nooks and crannies.
.JPG)
So, everyone got taken outside one fine desert summer day and stained. The staining process involves wood stain (really?), cheap brushes, soft rags, and rubber gloves. Doing it without gloves means you end up Dark Walnut 2716. It does not wash off. It will eventually come off in a similar timeframe to permanent marker. You've been warned. If you are secretly envious of snow leopards, here's your chance.
Load up your brush and flood the piece in question. Too much stain is not really an option. Get it all over the surface you want, and then chase all the runs and drips around the sides. That will result in runs and drips all down the back side if you aren't careful, so sneak up on it. Once it's all good and covered in wet stain, leave it for a minute. Some areas will soak it up and look dryish. That means it wants more stain. Once the whole surface has stopped drinking it in, give it a little bit to really settle in there (We're talking a minute or two. Don't leave for a sandwich.) Ball up a soft rag that you no longer love and wipe the excess stain from the surface of the project. Keep doing this until the rag comes away clean-ish and set the board aside to fully dry. For small pieces, you can do the entire thing at once and set them on something with points. Some woodworkers have a board all full of nails like a carnival act, as each nail point will leave the barest trace in the project's finish, but I have a bag full of d4's from my Dungeons & Dragons days that works just as well. Three or four of those under a piece keeps it from sticking to the tarp and leaving marks where it was resting on something.
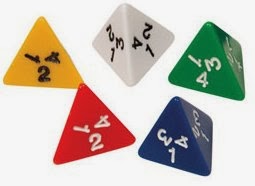 |
| If you thought we couldn't get geeky during this, you must be new here. |
Brush on the clear coat with another chip brush or one of those foam ones. Let it dry, and then lightly sand it with a fine sanding block. Be gentle, as you don't want to break through the polyurethane and into the wood. Just give it a light sanding to knock off bubbles and weirdness. Wipe it down with a damp towel or rag to remove the dust and give it a second coat.
Final assembly happens next. The pocket holes from earlier should all be oriented down, so that you screw in from underneath each shelf. They may also want to "walk" a little on you since they go at an angle, so consider clamping a stop block above the shelf to keep your corners from getting weird.
 |
| If it's worth doing, it's worth overdoing. |

Once assembled, stained and clear coated, we painted under the bottlecaps black. (The bottom of the top? The lowermost upper part? The recess the caps go in.) This will let the caps be their own thing and help distract from the only place you can see screws. If it really offends you, oversink the screws, fill the holes, sand them flush, and then paint.
The caps were an interesting challenge. We knew we wanted to do it and all the caps in our house had very similar dimensions, so I laid them out on the computer and figured out we need 216 caps to cover that bar top. Oy. So we had been collecting caps for a while, and helpful friends donated a bunch, and then we got impatient and got on Etsy and bought a sack full of weird indie soda caps to finish the set. These got a test fit in the bar to begin with:
 |
| My God, it's full of caps! |
Something to keep in mind: When you test half a dozen brands of caps and they all come out the same, don't assume that every cap you ever get will be the same. In our limited experience, all caps are the same, except for Kona Brewing Co. If you aren't a fan of Hawaiian microbrews like some of our friends, you'll do just fine. But do check and make sure that some aren't wider or taller than expected and make the entire process a weird race between pressure and setting glue waiting to go off like the Bottlecap Mine from Fallout. A product that will save a huge amount of time for you here is Zip-Kicker by ZAP, a superglue accelerator that cures superglue almost instantly. Apply the glue, press the parts together, spritz with Zip-Kicker and it's over. We could apply a dozen caps, drip glue on all the intersections and bam! They're done. On to the next ones.
 |
| There will be casualties. |
What we used is a two-part epoxy resin. It's great for sealing wood forever, jewelry keepsakes, super-gloss coatings, and (if you're really amazing) 3D paintings of fish and octopi. We bought a sleeve of clear plastic cups and tongue depressors for tools, and had on hand a tarp for drips in the apartment. Also, a deck of cards, not just because the process takes a long time, but also because it's on of the most precise ways you can level a piece of furniture. Resin finds its own level like water, so if your piece is tilted, your resin will tilt against it. We used a level and slipped a card under each foot until it was level side to side and front to back. A degree or two won't matter to a bar in use, but matters a lot to resin.
 |
| Playing card shims and the heat gun. |
Mask off the top and sides of your bar surface in case of spills. Mix and pour your first cup of resin all around the inside edge of the lip and let it set up for a couple hours or overnight. You don't want to find out that your top-to-lip edge has a small pinhole when the weight of the resin forces drips through the bottom of it. Once this initial pour has set up pretty good, you can begin assembly-lining your resin. A mixed while I poured and we got our timing down to where I was smoothing each layer down when she had the next ready. We used four or five cups of resin, but its better than mixing a large volume and only needing a little bit of it. And since you will have a little left over at times, maybe set aside a locket or two that you want to seal pictures into with the remainder.
The mixing and pouring of resin introduces bubbles. These will slowly work their way to the surface and can be broken by hot air causing them to expand and pop. A blow dryer is probably too much force, and I've seen DIY shows where folks set the table on fire with a blowtorch, so we used A's embossing heat gun. The output is a few hundred degrees, but no more forceful than blowing on the bubbles with your mouth. For us, it was the perfect middle ground. Professional bar installers use a propane or butane torch and briskly pass it over the surface. Hang out in one spot, the bar goes up in flames. You've been warned.
We encountered a unique problem at this point: The bubbles never stopped. Not the little pinhole bubbles, those broke the first time we heated the bar. Instead, large bubbles kept forming under the resin surface. Eventually I realized it was the air under the caps, heated until it expanded and bubbled out from underneath! There are two fixes for this: One, glue the caps down completely around their edge air-tight and leave no way for the air to escape. Two, pour a thin layer of resin to seal the bottoms of the caps, let it harden up for a few hours, then resin to your heart's content. If I had it to do over again, I'd definitely go that second route:
 |
| Ooh, perfessional. |
Resin sticks readily to itself and you can't see the layers later, so don't feel like the various steps are timed. Work in small batches, mix and pouring as you go, until you get to where you need to. Once you've poured all the resin, remove the tape and let it cure for a few days before you put anything on it. It will be cured enough to no longer be tacky after the first 12 or so hours, so it's critical to keep that area dust and hair free for at least that period. Once cured, hang some glasses, put in some bottles, and kick back with your new bar!


If you are interested in plans and a cut list for this project, or want to commission plans for a similar project, feel free to contact us!
No comments:
Post a Comment