

As artists, J and I are both creative and inevitably broke. This means we do most of our shopping at thrift stores, and I spend a lot of time mending clothing to make it last past its use-by date. During this process, I often get bored of stitching things up and trying to make them look "like new." What if I could make them better than new? More interesting or unique? Cue this week's post, a story about what happens when A gets bored and won't let go of her prized gray sweatshirts.
The first shirt I decided to experiment on is a gem I found at a thrift store. It still had a lot of life left in it, and I loved the cowl neckline as opposed to a standard hood. Unfortunately, a year after I bought it, it had developed a couple small holes in the kanga pouch. Unwilling to give up my unique find, I decided to go the creative route and patch up the shirt with some interesting fabric. This is what the original garment looked like:
 |
| My favorite sweatshirt EVER! |
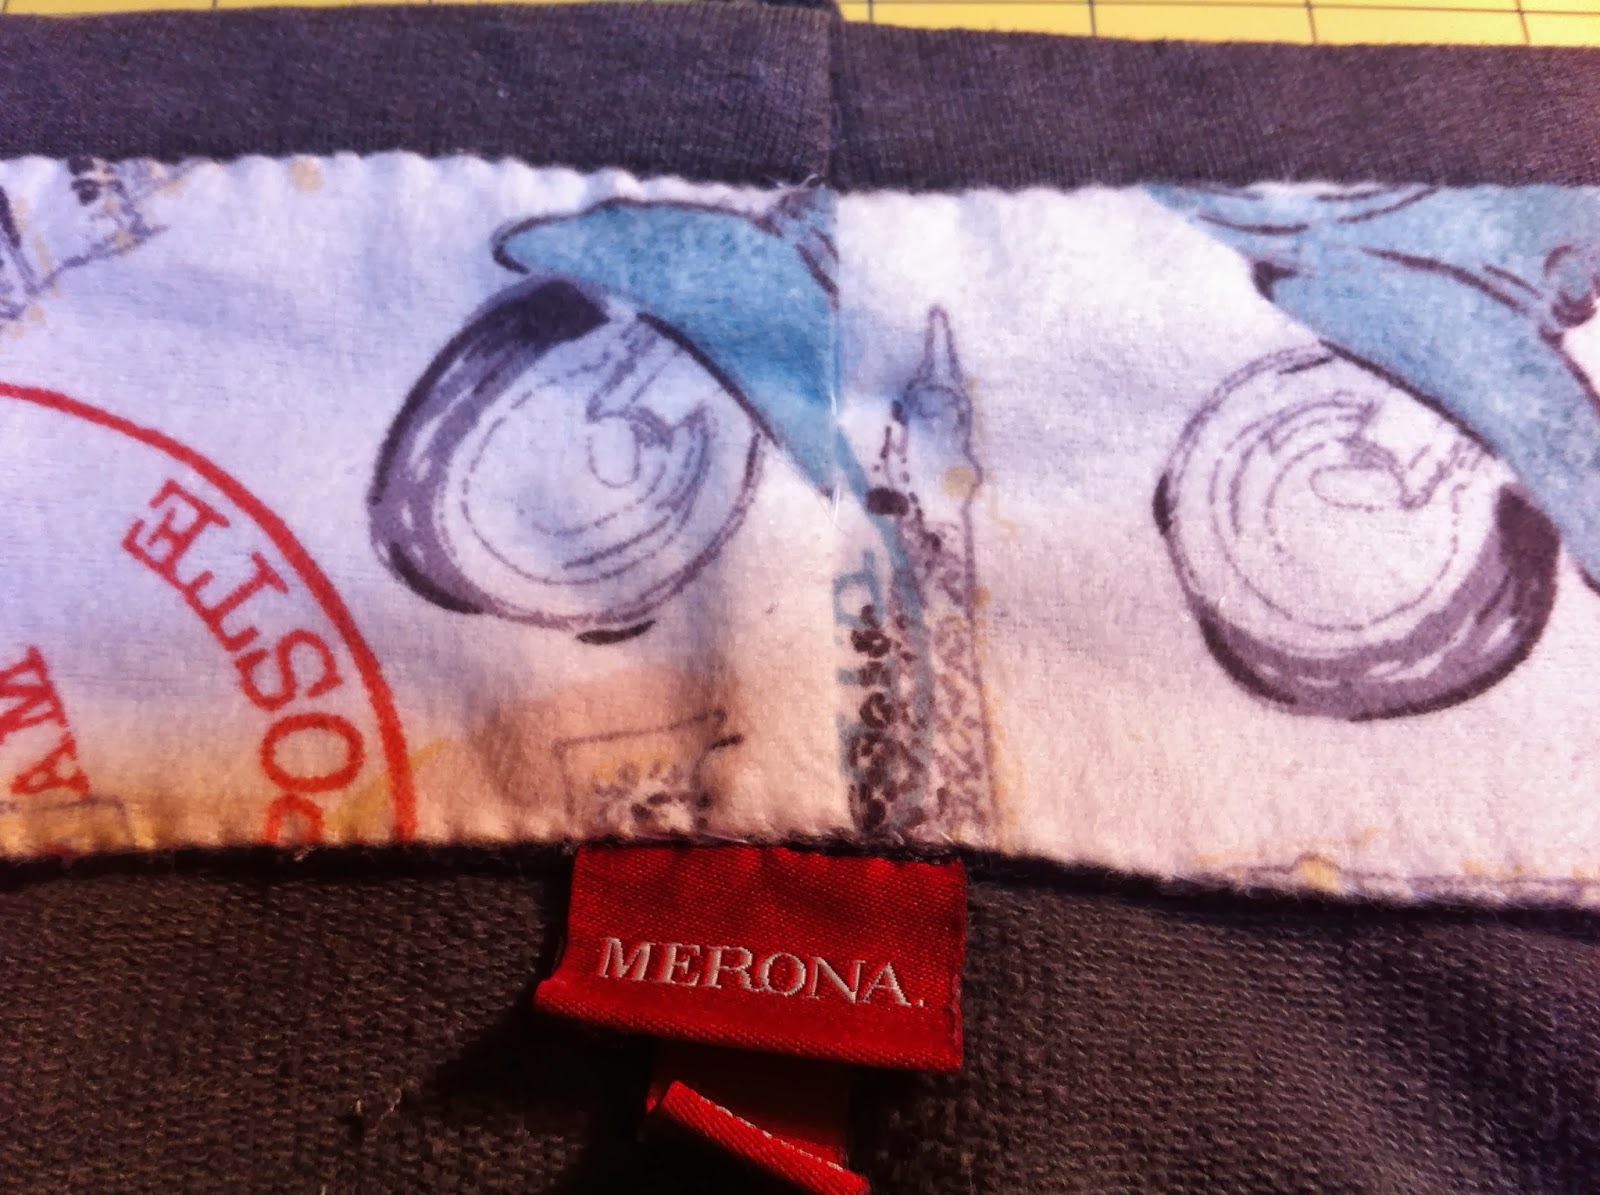
I started by laying a piece of tracing paper over the kanga pocket and tracing around the outside edge of the pocket to get an accurate shape. I then measured each side and recorded the measurements on my tracing paper "pattern." Then I carefully decided what section of my flannel I wanted visible for the pocket (the design was important to me and I was determined to include that red postage stamp). I pinned my fabric to my pattern and cut around it, leaving a 1/2" seam allowance.

Then I laid it over the existing pocket and attempted to center it on the pocket as best I could. This also gave me a moment to see what the pocket would look like in case I hated it. Luckily I didn't, so I proceeded to the next step.
 |
| Yes, I actually found Vespa fabric. |

I sewed around the bottom three edges and the top edge with my machine, working to get the stitching as close to the edge of the fabric as possible. Then I hand stitched the two curved edges through the top layer and pocket layer only, leaving the pocket open on both sides for my hands.
Although the pocket was the only damaged part of the shirt, I wanted to incorporate the new fabric in one more area of the shirt to help it look more purposeful. This particular shirt has an interesting cowl-style collar where the inside is often visible. So I lined the interior of the collar with the flannel, making it warmer, softer, and more colorful than it was before.
 |
| Before exterior |
 |
| Before interior |
To manage this, I started by measuring the circumference and width of the original cowl piece, minus the edge pocket where the laces are strung. The cowl has a bit of a curve, making the width variable, so I cut the fabric to be equal to the widest part of the collar. I sewed the ends of my rectangular piece together and lined them up with the seam in the back of the collar before folding under the edges and pinning the whole thing into place. While pinning, I was careful to pin the top edge of the new fabric so that my stitches would run just under the pocket where the laces are strung. I didn't want to have to fight to keep the laces out of my stitching.

So that the stitches wouldn't show on the outside of the garment, I hand stitched the entire collar lining, working to catch only the inside of the laces pocket on the top edge and the seam where the collar was attached to the shirt on the bottom edge.
I hid my knots at the beginning and end as cleanly as possible since the lining is often visible. You can see the curve of the piece in the photo below.

After a lot of hand stitching (which I'm much improved in, thanks to this project), the final product is a fun and unique piece of clothing with the equivalent of a flannel scarf and handwarmer.
 |
| Just add a pop of collar. |
The second sweatshirt I decided to edit was a Christmas gift from my sister-in-law. The hoodie was purchased online off a wishlist, and I was excited to receive it; however, apparently my arms are longer than that of the average Korean woman. As you can see, there are thumb holes in the cuffs that don't come close to reaching my thumbs. Instead of sending the shirt back to Korea, I came up with a way to fix that.

The fix I devised involved adding a length of fabric to each sleeve at the elbow. I started by measuring the distance from the thumb holes to my actual thumbs, which was approximately 4 1/2". That gave me the width of fabric (before seam allowances) I would need to lengthen each sleeve appropriately.

J then helped me mark a spot just above my elbow to chop off the existing sleeve on one side. After cutting, I measured the cut piece and made sure to cut the opposite sleeve the same length.

For interest and contrast (I was never going to find the exact same color of fabric), I went with a dark heather gray for the elbow "patch." I measured the circumference of the cut sleeve at the cut and cut the dark gray to be the circumference plus 1/2" (for my serger's seam allowance) by the 4 1/2" measurement plus 1/2". Both strips were serged together on the short end with right sides facing.

Now that I had created my new sleeve extensions, they needed to be attached to the garment. I placed one extension over the outside of a cut edge of sleeve. I made sure the right sides of the fabric were facing, that the cut edges lined up, and that the seams lined up to imply one continuous seam. The fabrics were pinned and the serged together.
 |
| Before serging |
 |
| After serging |
Then I needed to attach the leftover length of the original sleeve to the newly attached extension. This followed the same directions, only a little trickier because I had to make sure I sewed the left to the left and the right to the right. Otherwise, the thumb holes wouldn't be in the right place...and since the entire purpose of this project was getting to use those thumb holes, that was of primary importance!
 |
| Before serging |
 |
| After serging |
Because I was so careful to line up my seams and I chose a heathered fabric, the sleeve extensions look original and intentional. I'll admit I look a bit like an 80's gym rat, but I like it nonetheless.

More importantly, my thumbs fit in the aforementioned thumb holes. Mission accomplished!

Although these projects are rather specific examples, I hope they give you a few ideas of ways you can edit, mend, fix, or alter existing pieces you love. Neither garments were purchased with the intent of making alterations, but I was excited for the opportunity to try something new. In fact, I enjoyed it so much I've picked up a few items at the thrift store recently for the express purpose of making creative alterations.
No comments:
Post a Comment